To stop a Puro theme (or any other theme, see the last section) from loading Google fonts, choose system fonts in the theme settings. Or remove the Google request and host the font files on your own server. Fonts from Google servers send each visitor’s IP address to Google. Hosting them yourself avoids that.
Which Fonts Each Theme Loads From Google
- Polestar: Montserrat for headings and Open Sans for body text. Polestar Premium adds Montserrat for the site title and tagline.
- Ultra: Mulish and Lato, always. Ultra Premium also loads every Google font you choose in Theme Design.
- Puro theme: none by default. Puro Premium loads the Google fonts you choose in Theme Design.
Option 1: Choose System Fonts
System fonts come from the visitor’s device, so no request leaves your site.
Polestar
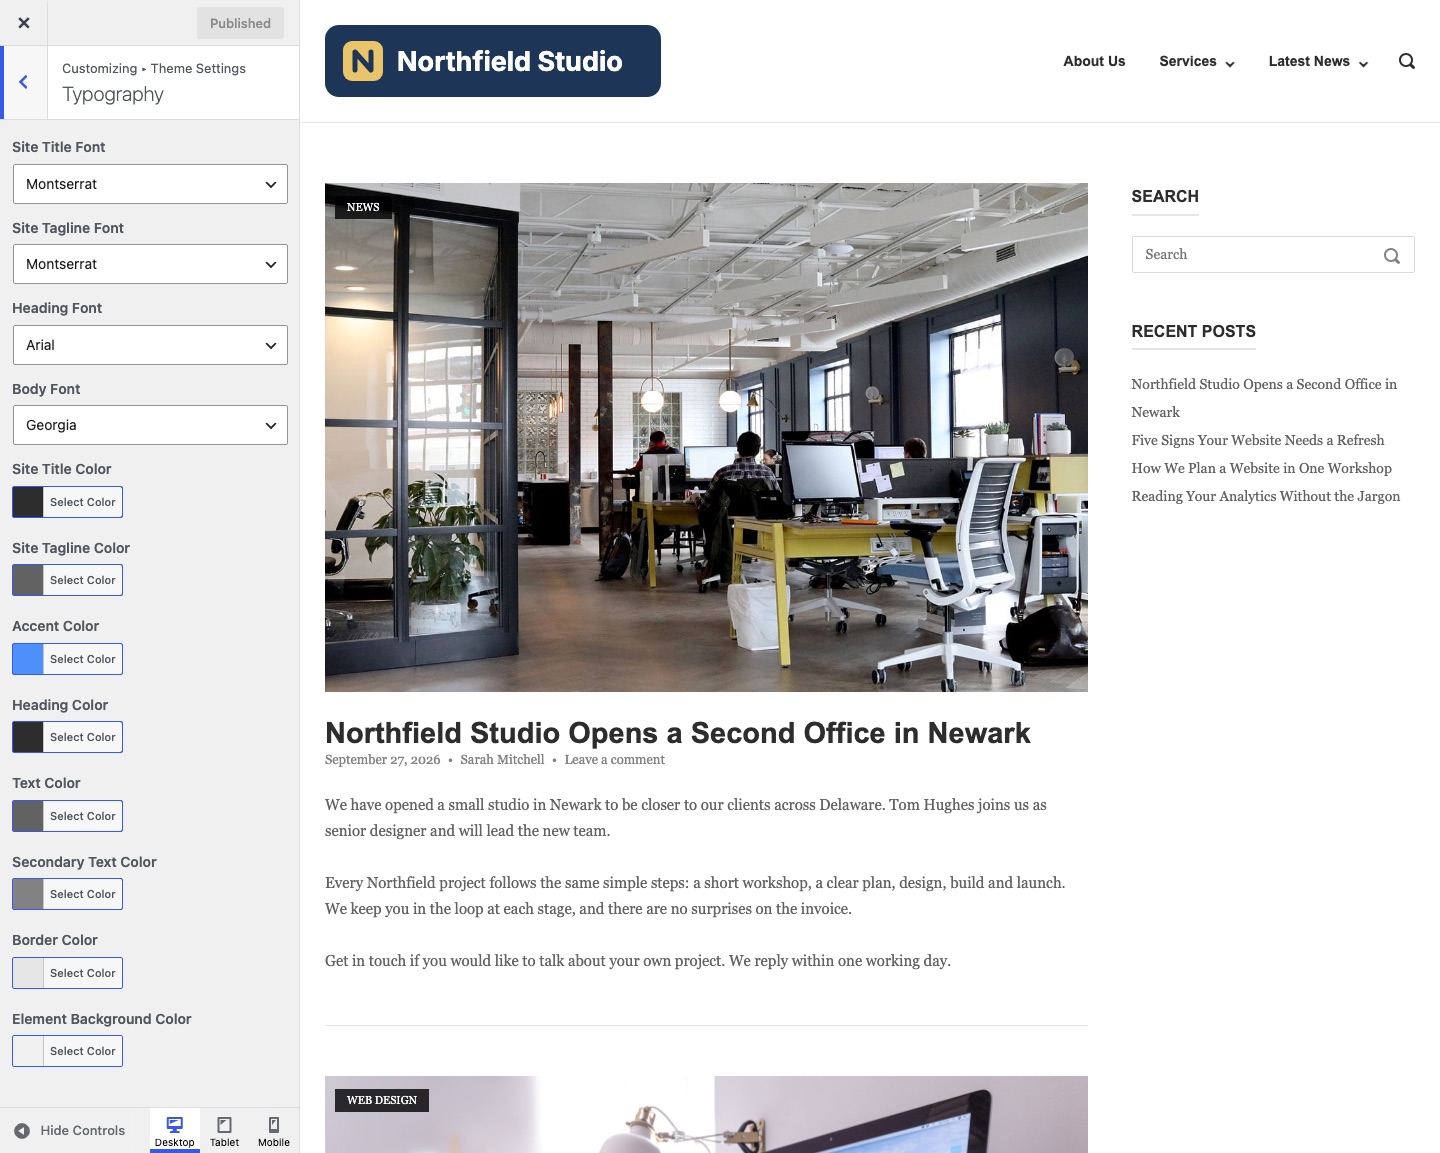
Go to AppearanceCustomizeTheme SettingsTypography. Set Heading Font and Body Font to a font from the Standard Fonts group, such as Arial, Georgia or Verdana. With Polestar Premium, set Site Title Font and Site Tagline Font the same way. When no chosen font is a Google font, Polestar loads no Google stylesheet.
Puro Premium
Go to AppearanceCustomizeTheme DesignFonts. Choose fonts from the Web Safe group for Heading Font and Body Font. Do the same for Site Title Font and Site Tagline Font in Theme Design > Header, and for Font in Theme Design > Menu.
Ultra
Ultra loads Mulish and Lato whatever you choose in Theme Design. Use Option 2 for Ultra.
Option 2: Host the Font Files
Step 1: Get the Font Files
The free OMGF plugin downloads the fonts that your pages request from Google. Its free version does not read fonts that a theme loads with @import inside inline CSS. Ultra Premium and Puro Premium use that method for fonts chosen in Theme Design.
For those fonts, download the files yourself with a tool such as google-webfonts-helper. Choose the weights your site uses, and download the woff2 files.
Step 2: Upload the Files
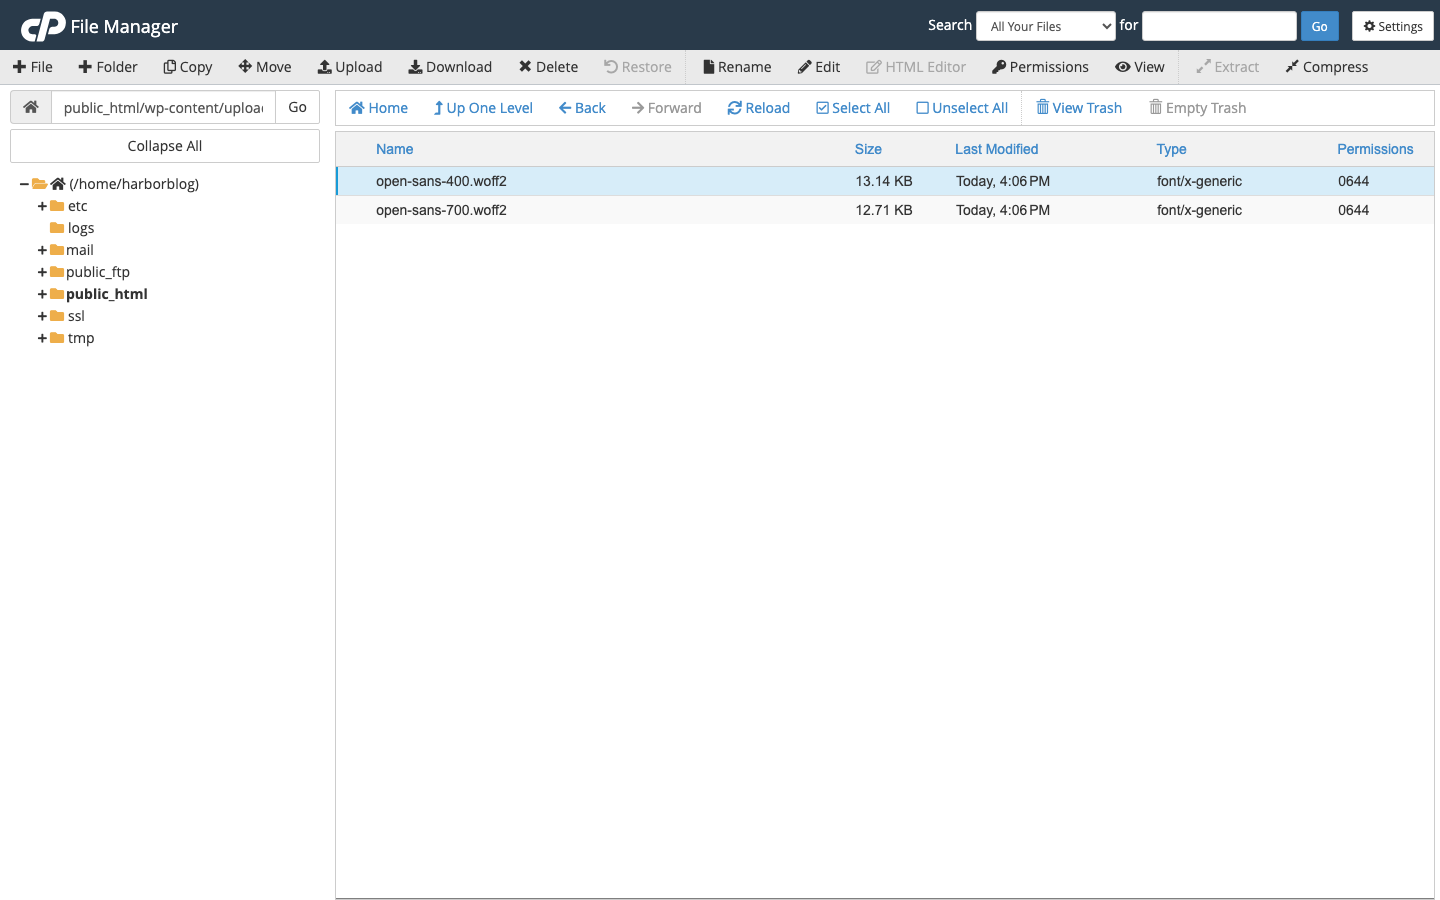
Upload the files to wp-content/uploads/fonts/ with FTP or your Hosting File Manager. WordPress does not accept woff2 files in the Media Library.
Step 3: Add the Font Rules
Go to AppearanceCustomizeAdditional CSS and add one rule for each font and weight. The name in font-family must match the name the theme uses. This example is for Open Sans in Polestar:
@font-face {
	font-family: 'Open Sans';
	font-style: normal;
	font-weight: 400;
	font-display: swap;
	src: url('/wp-content/uploads/fonts/open-sans-400.woff2') format('woff2');
}
If WordPress is in a subfolder, use the full URL of the file in src.
Step 4: Stop the Google Request
Add the code for your theme to the functions.php file of a child theme. You can also run it with the Code Snippets plugin. Leave out the opening PHP tag.
Polestar and Polestar Premium:
function polestar_child_remove_google_fonts() {
	wp_dequeue_style( 'polestar-fonts' );
	wp_dequeue_style( 'polestar-premium-fonts' );
}
add_action( 'wp_enqueue_scripts', 'polestar_child_remove_google_fonts', 100 );
Ultra and Ultra Premium:
function ultra_child_remove_google_fonts() {
	wp_dequeue_style( 'siteorigin-google-web-fonts' );
}
add_action( 'wp_enqueue_scripts', 'ultra_child_remove_google_fonts', 100 );
add_filter( 'ultra_import_google_fonts', '__return_false' );
Puro Premium:
add_filter( 'puro_import_google_fonts', '__return_false' );
Check the Result
- Clear your page cache and any CDN cache.
- Open your site in a private browser window. View the page source and search for
fonts.googleapis.com. It must not appear. - Open the developer tools, click the Network tab and reload. Filter by
font. The font files must come from your own domain.
Load Fonts Locally in Any Theme
- Install and activate the free OMGF plugin. It works with any theme that loads Google fonts in a standard way. It downloads the fonts that your pages request and serves them from your server.
- In a block theme, open Appearance > Editor, click Styles and open Typography. In the Fonts section, click Add fonts or Manage fonts. The fonts that you install there are stored on your server.
- To find where a theme loads Google fonts, open your site and view the page source. Search for
fonts.googleapis.com. Theidof thatlinktag names the style handle. - To host the files yourself, upload the
woff2files and declare them with@font-face. Add the rule at AppearanceCustomizeAdditional CSS in a classic theme. A block theme has no Customize screen. There, go to AppearanceEditor, click Styles, open the three-dot More menu and choose Additional CSS. Click Publish or Save.
@font-face {
	font-family: 'Open Sans';
	font-style: normal;
	font-weight: 400;
	font-display: swap;
	src: url('/wp-content/uploads/fonts/open-sans-400.woff2') format('woff2');
}
The theme must still use the same font-family name. To stop the Google request, dequeue the style handle that you found in step 3 with wp_dequeue_style().