To update a theme from a zip file, upload the zip at AppearanceThemesAdd ThemeUpload Theme. Then click Replace installed with uploaded. You do not need to switch themes or delete the old version first. The steps are the same for classic and block themes.
- Keep the theme file as a zip. If Safari unzipped it, see Stop OS X Safari Auto Unzipping Downloaded Folders.
- Go to AppearanceThemes and click Add Theme, then Upload Theme.
- Click Choose File, select the zip and click Install Now.
- WordPress finds the installed theme and compares the versions. Click Replace installed with uploaded.
- Go to AppearanceThemes and check the new version number.
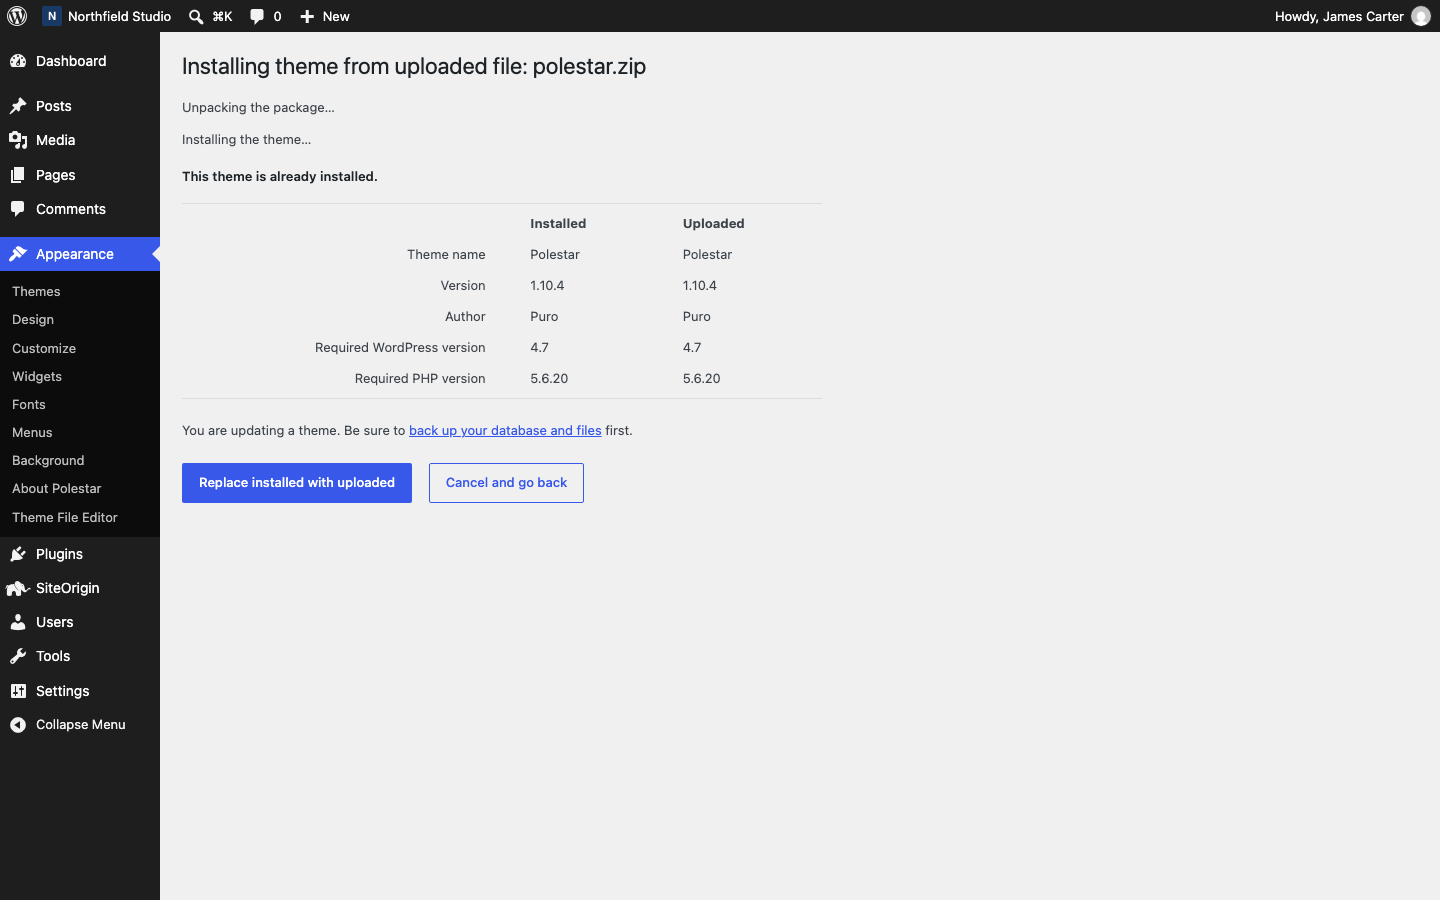
Theme settings and content stay. Changes you made to theme files, in Theme File Editor or by FTP, are lost. Put code changes in a child theme. Templates you edited in the Site Editor are saved in the database, so the update keeps them.
Free to Premium With a Zip
After you move the Puro theme or Ultra from free to Premium with a zip, enter your order number. Go to AppearanceCustomizeTheme SettingsPuro Premium and fill in Order Number. In Ultra, the section is Ultra Premium. Premium updates then arrive in the WordPress updates screen. See Upgrading Puro Theme from Free to Premium.
Polestar Premium is a plugin. See Installing Polestar Premium.