Polestar has free font settings at Theme Settings > Typography. The Puro theme and Ultra have font settings in Theme Design, and those need Premium. Free Ultra has no font settings.
Change the Font in Polestar
- Go to AppearanceCustomizeTheme SettingsTypography.
- Choose a font in Heading Font. It sets
h1toh6, page and post titles, and the main menu links. The default is Montserrat. - Choose a font in Body Font. It sets body text. The default is Open Sans.
- Click Publish.
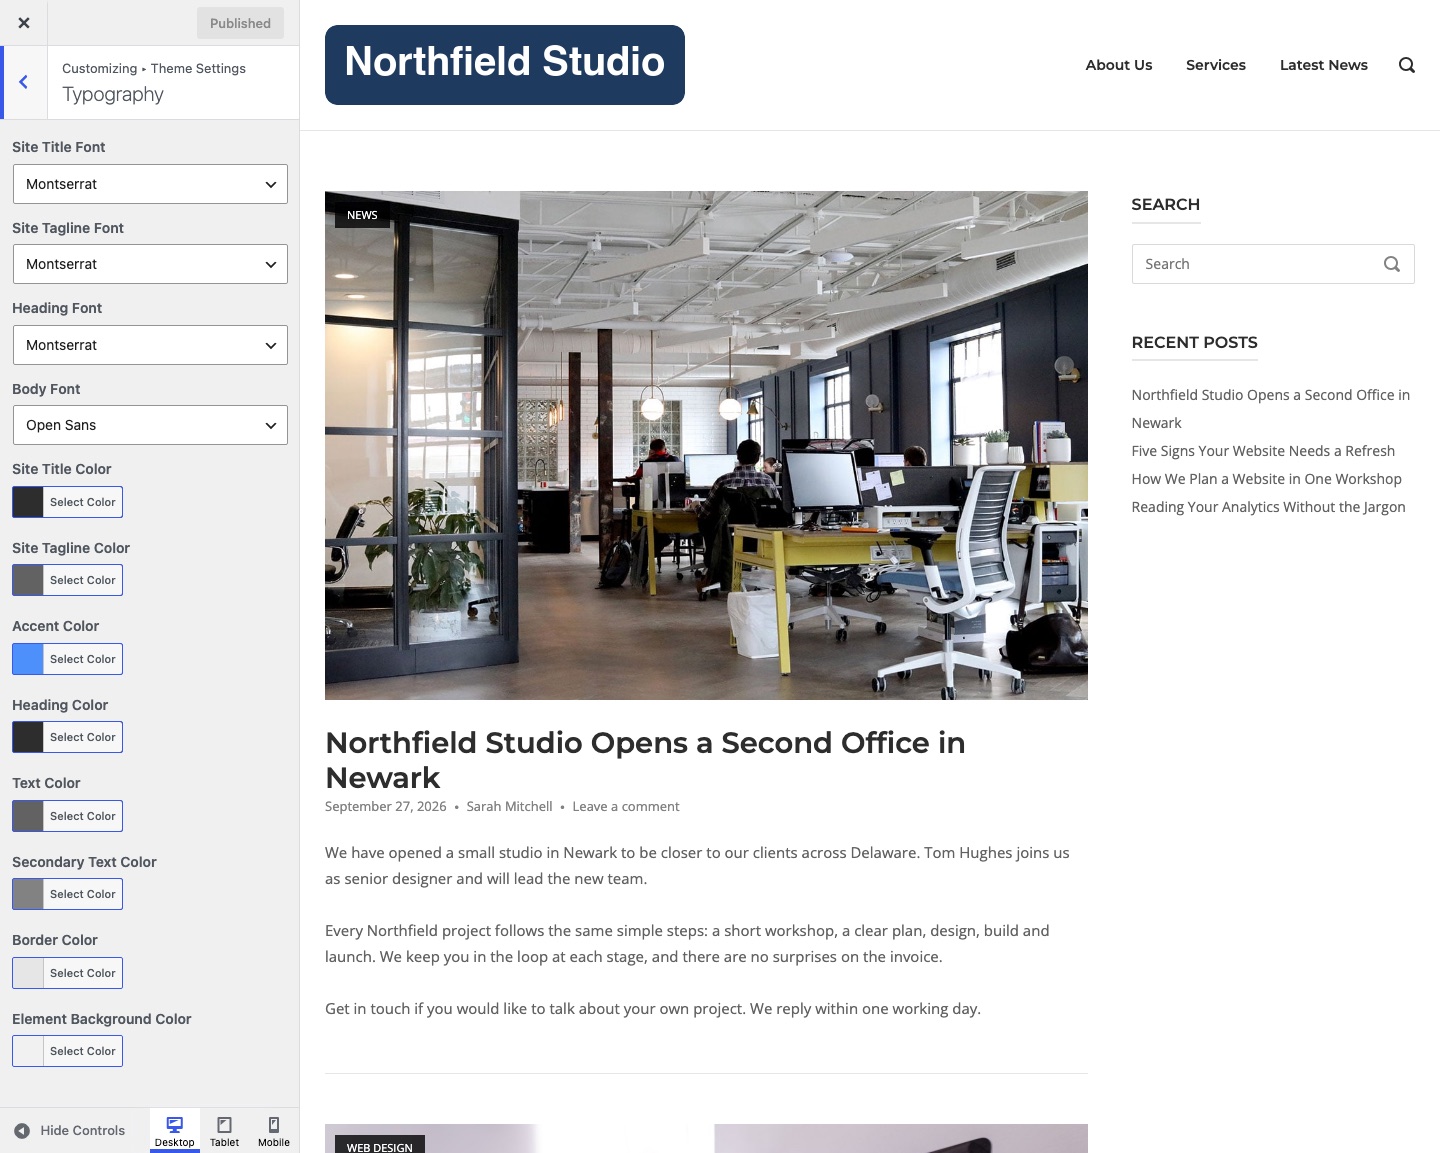
Each list has a Standard Fonts group and a Google Fonts group. Without Polestar Premium, Heading Font also sets the site title and tagline. Polestar Premium adds Site Title Font and Site Tagline Font. Polestar has no font size setting. Set sizes with CSS. See CSS Snippets.
Change the Font in the Puro Theme
These settings need Puro Premium. Go to AppearanceCustomizeTheme Design.
- Fonts > Heading Font: all headings. The default is Arial.
- Fonts > Body Font: body text, buttons and form fields. The default is Helvetica Neue.
- Header > Site Title Font and Site Tagline Font: the text in the header.
- Menu > Font: the main menu.
Each font list has a Web Safe group and a Google Webfonts group. Size settings in ems sit next to most font settings. See Fonts.
Change the Font in Ultra
These settings need Ultra Premium. Free Ultra uses Mulish and Lato and has no font control. Go to AppearanceCustomizeTheme Design.
- Top Bar > Font: the top bar.
- Header > Site Title Font and Site Tagline Font: the text in the header.
- Main Menu > Font: the main menu.
- Content Header > Heading Font: the page or post title. Breadcrumb Font sets the breadcrumb trail.
- Content > Text Font: body text, sidebar text, the footer widget text and the bottom bar.
- Content > Heading Font: headings in the content, and the titles of sidebar and footer widgets.
Each font list has a Web Safe group and a Google Webfonts group. A Google font can carry a weight, for example Lato (700). Size settings in pixels sit next to most font settings. See Content.
The Font Does Not Change
- Click Publish in the Customizer. A change stays a preview until you publish it.
- Clear your page cache and any CDN cache.
- Check the setting for the part of the page you changed. In Ultra, the footer text uses Content > Text Font. No separate footer font setting exists.
Use Fonts From Your Own Server
Google fonts load from Google servers. To host them yourself, see Load Fonts Locally Instead of Google Fonts.
Change the Font in Any Theme
- Check the theme settings first. In a classic theme, look for a typography or fonts section in Appearance > Customize.
- In a block theme, open Appearance > Editor and click Styles. Open Typography and choose a font for text, links, headings, captions and buttons.
- To set a font with CSS, open your site and right-click the text. Right-click the element and choose Inspect. In Safari, turn on the Develop menu first and choose Inspect Element. The Computed tab shows the current
font-family. - Add the rule at AppearanceCustomizeAdditional CSS in a classic theme. A block theme has no Customize screen. There, go to AppearanceEditor, click Styles, open the three-dot More menu and choose Additional CSS. Click Publish or Save. Set the body and the headings:
body {
	font-family: Georgia, serif;
}
h1, h2, h3, h4, h5, h6 {
	font-family: Arial, sans-serif;
}
Some themes set fonts on elements such as .site-title or .main-navigation a. Add those selectors if the change does not show.
Use a Font That Is Not on the Device
A font must be licensed for web use. Fonts on Google Fonts carry open licenses. In a block theme, Styles > Typography has a Fonts section. Click Add fonts or Manage fonts to install a font. WordPress stores the files on your server. In other themes, upload the font files and declare them with @font-face. See Load Fonts Locally Instead of Google Fonts.