SwiftGrid shows your WooCommerce products as a spreadsheet inside the WordPress admin. You edit prices, stock, SKUs and other fields across hundreds of products on one screen, then save once. The free version has no product limit.
If SwiftGrid is not installed yet, see Installing SwiftGrid.
Open the Grid
Click SwiftGrid in the admin menu. The grid loads your products, with one row per product and one column per field. The line next to the page title counts the products shown, for example “Showing 113 products”.
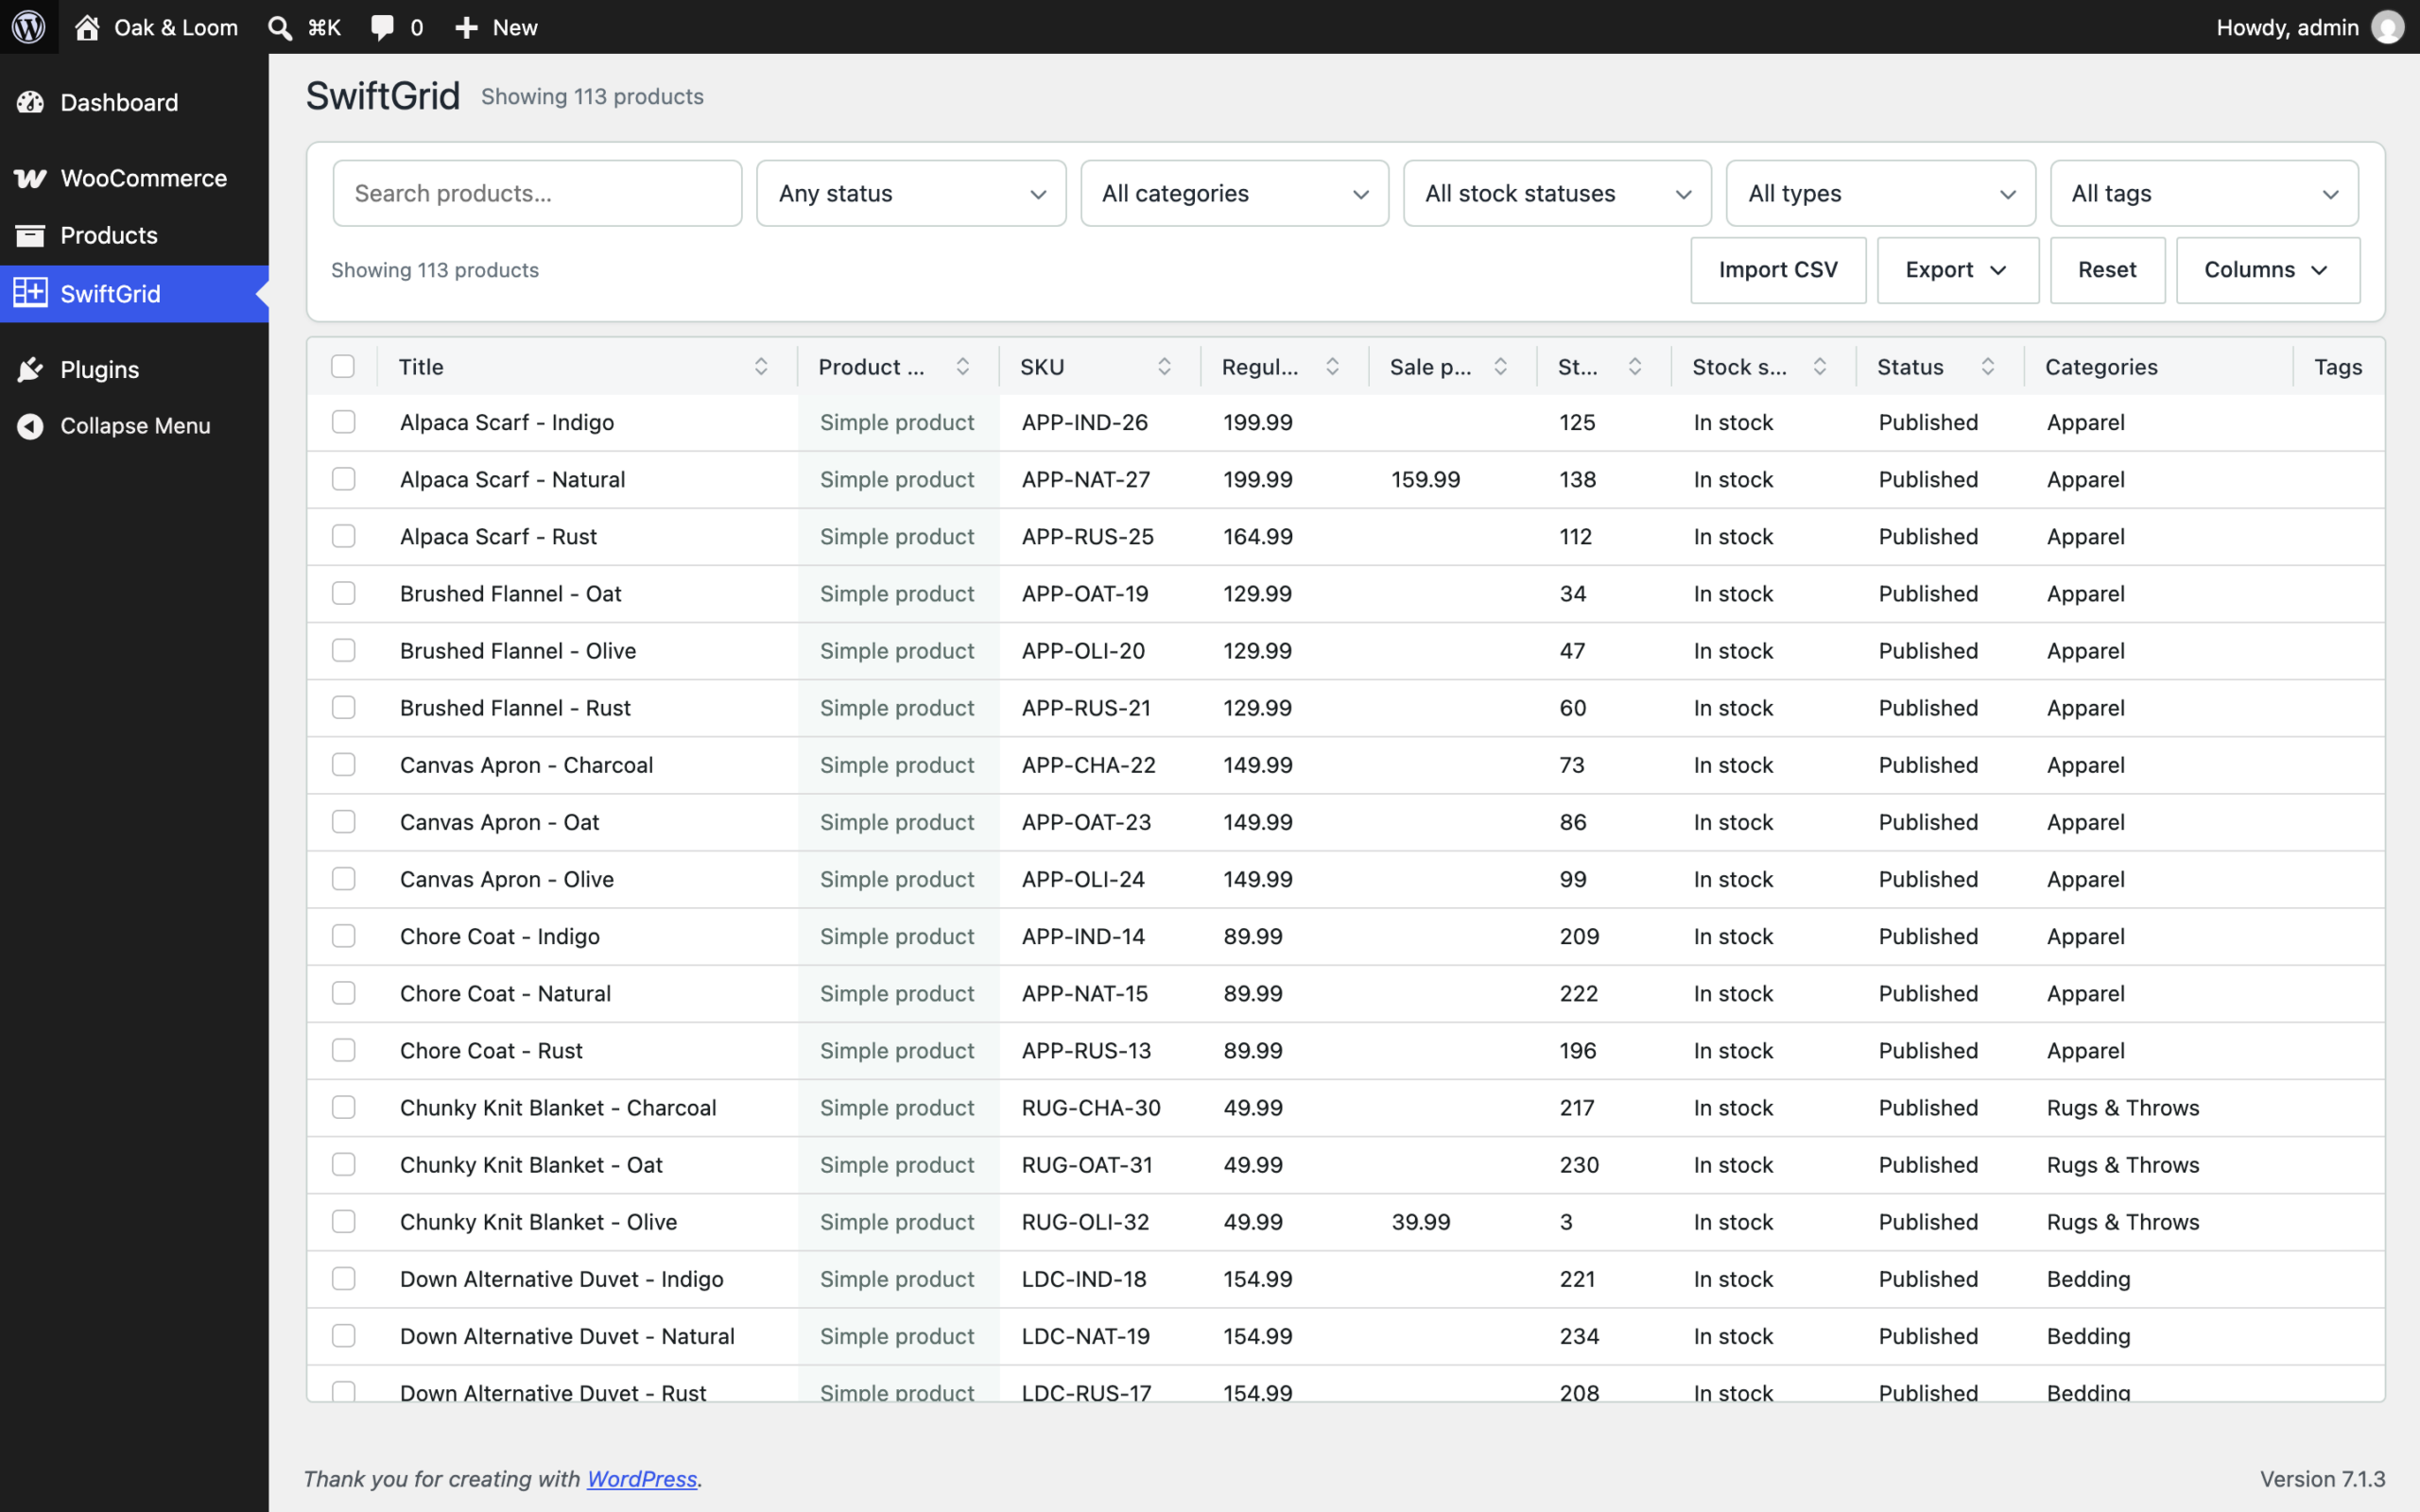
The screen has three parts:
- The filter bar at the top holds the search field, the filters, and the Import CSV, Export, Reset and Columns buttons.
- The grid lists your products. Variable products have an arrow that shows their variations.
- The status bar below the grid shows the number of unsaved edits and the result of your last action.
Make Your First Edit
- Click a cell, for example a product’s Regular price.
- Type the new value, then press Enter.
- Edit any other cells the same way.
- Click Save Changes.
SwiftGrid marks each edited cell with a small triangle in its corner and counts your unsaved edits above the grid. Nothing reaches your store until you click Save Changes, or press Ctrl+S (Cmd+S on a Mac). To drop your edits instead, click Discard Changes.
Related
- Installing SwiftGrid
- Installing SwiftGrid Pro
- Editing Products in the Grid
- Bulk Editing Prices with the Cell Calculator
- Searching and Filtering Products
- Editing Variations