WooCommerce settings control shop columns, the shop sidebar, the product gallery, the mini cart and product buttons. They are at AppearanceCustomizeTheme SettingsWooCommerce. The section appears when the WooCommerce plugin is active. Set up the store itself at WooCommerceSettings.
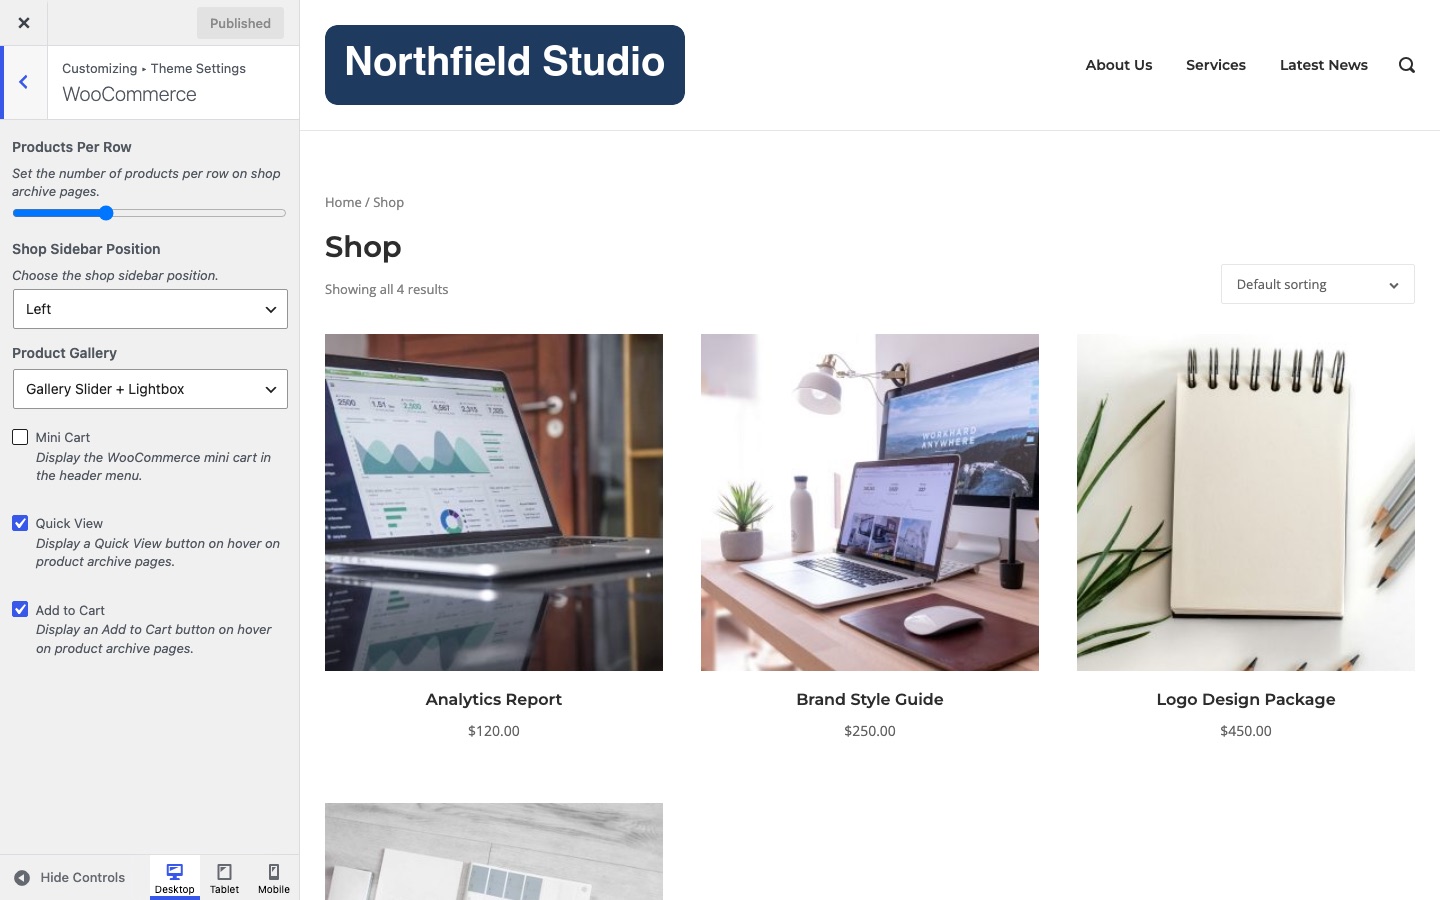
Products Per Row
Sets the number of products per row on shop archive pages. The default is 3. The range is 2 to 5.
Shop Sidebar Position
Places the shop sidebar on the left or the right. The default is Left. The sidebar shows on the shop and product archive pages, not on single products, and only when the Shop Sidebar widget area has widgets.
Product Gallery
Sets the gallery on single product pages. The default is Gallery Slider + Lightbox.
- Gallery Slider shows the image slider only.
- Gallery Slider + Lightbox opens an image in a lightbox on click.
- Gallery Slider + Zoom zooms into an image on hover.
- Gallery Slider + Lightbox + Zoom adds both.
Mini Cart
Displays the WooCommerce mini cart in the header menu. Off by default. With Max Mega Menu or UberMenu active, Polestar hides it.
Quick View
Displays a Quick View button when visitors hover over a product on archive pages. On by default.
Add to Cart
Displays an Add to Cart button when visitors hover over a product on archive pages. On by default.
Set Up Cart and Checkout Pages
Keep visitors focused on the sale. Edit the Cart and Checkout pages and set Page Layout to Stripped in the Page Settings box. Stripped replaces the menu with a Go back link and removes the sidebar.
On the My Account and order tracking pages, use No Sidebar or Constrained.